> ## Documentation Index
> Fetch the complete documentation index at: https://help.mercury360.com/llms.txt
> Use this file to discover all available pages before exploring further.
# Schedule Event
> Create and schedule a call or interview with a candidate, including attendees, timing, and location.
Use **Schedule Event** to create a planned candidate interaction—either a **Call** or an **Interview**—with the right context, attendees, and logistics.
## When to use this
Use this when:
* You want to schedule an interview for a candidate
* You want to arrange a call with a candidate
* You need to assign attendees and timing for hiring discussions
Use this only for **planned candidate interactions** (calls and interviews).
## Start scheduling an event
From the **Events** page, click **Schedule Event**.
Follow the guided step-by-step flow.
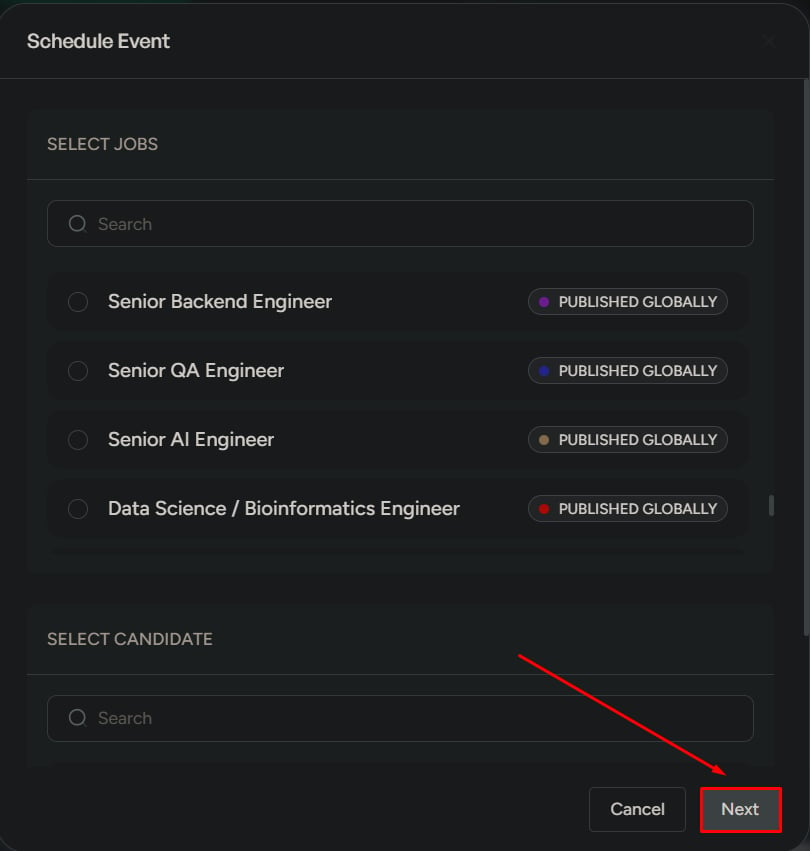
 ## Step 1: Select context
Select both:
* **Job**
* **Candidate**
The job and candidate must belong to the **same hiring pipeline**.
You can’t schedule an event without selecting **both** a job and a candidate.
Then click **Next**.
## Step 1: Select context
Select both:
* **Job**
* **Candidate**
The job and candidate must belong to the **same hiring pipeline**.
You can’t schedule an event without selecting **both** a job and a candidate.
Then click **Next**.
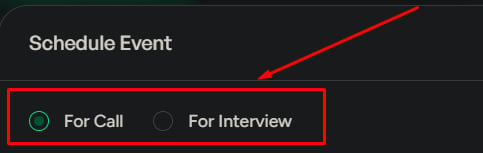
 ## Step 2: Choose event type
Select one:
* **Call**
* **Interview**
This determines the template and format used for the event.
## Step 2: Choose event type
Select one:
* **Call**
* **Interview**
This determines the template and format used for the event.
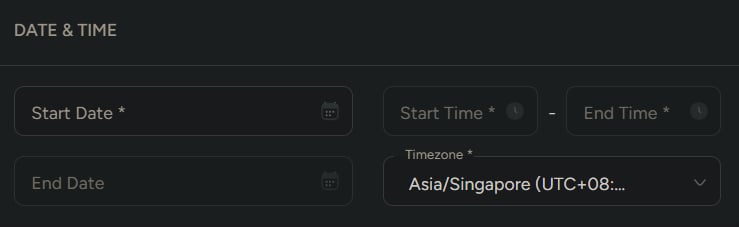
 ## Step 3: Set date and time
Add:
* **Start date** and **end date**
* **Start time** and **end time**
* **Timezone**
Double-check the timezone before scheduling to avoid overlaps or missed interviews.
## Step 3: Set date and time
Add:
* **Start date** and **end date**
* **Start time** and **end time**
* **Timezone**
Double-check the timezone before scheduling to avoid overlaps or missed interviews.
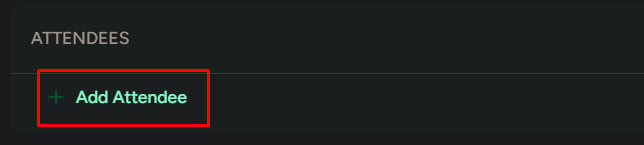
 ## Step 4: Add attendees
Add everyone who should attend the event, such as:
* Recruiters
* Interviewers
* HR members
Missing attendees can lead to incomplete feedback and communication gaps. Make sure all required participants are added before scheduling.
## Step 4: Add attendees
Add everyone who should attend the event, such as:
* Recruiters
* Interviewers
* HR members
Missing attendees can lead to incomplete feedback and communication gaps. Make sure all required participants are added before scheduling.
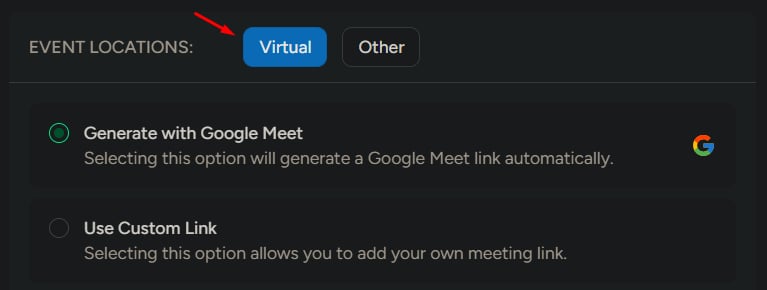
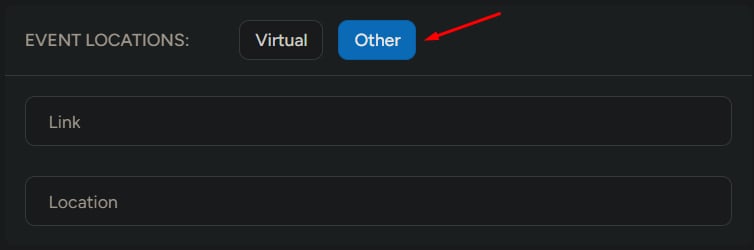
 ## Step 5: Set location
Choose one:
### Virtual
* Add a **meeting link** (required)
### Other
* Add a **location** (required)
* Add a **meeting link** (optional)
Choose the location type that matches the meeting format.
## Step 5: Set location
Choose one:
### Virtual
* Add a **meeting link** (required)
### Other
* Add a **location** (required)
* Add a **meeting link** (optional)
Choose the location type that matches the meeting format.
 ## Step 6: Event details
Details depend on the event type:
* **Call**: uses the default call template
* **Interview**: uses the default interview template
Templates help keep communication consistent across interviews and calls.
## Step 7: Attach files (optional)
Upload relevant files (max **5 MB**), such as:
* Resumes
* Notes
* Interview materials
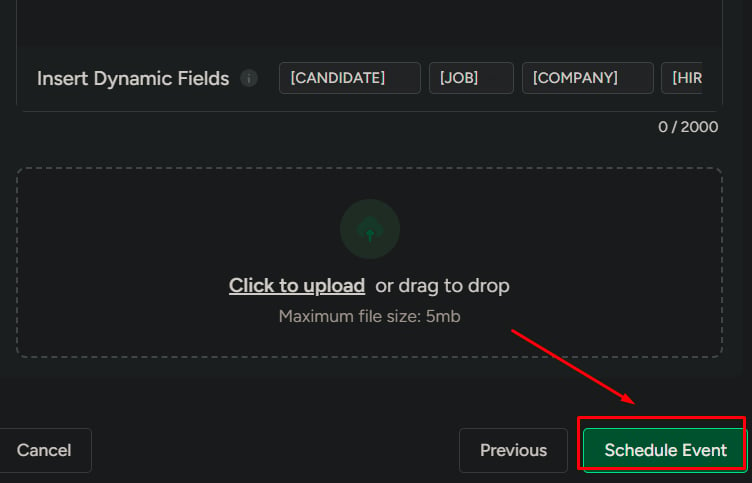
## Step 8: Schedule event
Click **Schedule Event**.
The event is created and shared with attendees.
## Step 6: Event details
Details depend on the event type:
* **Call**: uses the default call template
* **Interview**: uses the default interview template
Templates help keep communication consistent across interviews and calls.
## Step 7: Attach files (optional)
Upload relevant files (max **5 MB**), such as:
* Resumes
* Notes
* Interview materials
## Step 8: Schedule event
Click **Schedule Event**.
The event is created and shared with attendees.
 ## What happens after scheduling
* The event appears in **My Events**
* Attendees can view event details
* The event can be **edited only by the creator**
* The event can be **canceled only by the creator**
## What to be careful about
* Selecting the wrong job or candidate can be difficult to fix later
* Incorrect time or timezone can lead to missed interviews
* Missing attendees can cause coordination and feedback gaps
Before scheduling, always review the **job**, **candidate**, **date/time**, and **timezone**.
## What happens after scheduling
* The event appears in **My Events**
* Attendees can view event details
* The event can be **edited only by the creator**
* The event can be **canceled only by the creator**
## What to be careful about
* Selecting the wrong job or candidate can be difficult to fix later
* Incorrect time or timezone can lead to missed interviews
* Missing attendees can cause coordination and feedback gaps
Before scheduling, always review the **job**, **candidate**, **date/time**, and **timezone**.